Free online image pixel mixer. Just drag and drop your image here and this tool will automatically shuffle its pixels in a chaotic order. You can shuffle pixels individually or by arbitrary groups/segments. In the options, you can set the width and height of pixel groups/segments, choose the shuffle direction (horizontal, vertical, or both), and control the level of pixel mixing. Created by engineers from team Browserling.
Free online image pixel mixer. Just drag and drop your image here and this tool will automatically shuffle its pixels in a chaotic order. You can shuffle pixels individually or by arbitrary groups/segments. In the options, you can set the width and height of pixel groups/segments, choose the shuffle direction (horizontal, vertical, or both), and control the level of pixel mixing. Created by engineers from team Browserling.
This tool mixes the order of pixels in an image. It divides the original image into segments of the specified size and then randomly shuffles these segments, changing the appearance of the image. The segment size can be specified in the options. If you set the segment size to a single number, for example, "8", then the tool will mix squares measuring 8×8 pixels. If you specify the segment size with two parameters, for example, "40×30", then the tool will mix rectangular segments 40 pixels wide and 30 pixels high. To see the size and shape of the created segments, activate the "Show Unmixed Segments" option, which outlines all the segments with dashed lines in the input image. If the outline color blends with the image colors, you can change the outline color for better visibility. By default, only the neighboring pixels will be mixed. To control the distance of randomness, you can set the maximum mixing step value. This option specifies the maximum distance each segment can move from its original position. You can further refine the randomness by specifying the percentage of segments in the image that should be shuffled. Pixel mixing can occur horizontally (segments shift within each row), vertically (segments shift within each column), or combined (segments shift across the entire image horizontally and vertically). Since most images cannot be perfectly divided into equal segments of the specified size, the image will often contain partial segments (with incomplete width or height) along the right edge or bottom edge. For images where dimensions don't perfectly align with the segment size, the third block of options lets you control how incomplete segments at the edges are treated. The "Exclude Partial Segments" option removes segments at the right edge that are smaller than the the specified segment dimensions. The "Shuffle Partials Separately" option mixes partial segments along the edges separately from full ones. The "Expand Partial Segments" option resizes partial segments to match the full segment dimensions with data within the partial segment. The "Fill with Average Color" option fills a partial segment with the average color of the available pixels. The "Fill with Custom Color" option fills a partial segment with a specified color. Finally, you can select the file format to save the image with mixed pixels. Available formats are PNG, JPEG, and WebP. Image-abulous!
This tool mixes the order of pixels in an image. It divides the original image into segments of the specified size and then randomly shuffles these segments, changing the appearance of the image. The segment size can be specified in the options. If you set the segment size to a single number, for example, "8", then the tool will mix squares measuring 8×8 pixels. If you specify the segment size with two parameters, for example, "40×30", then the tool will mix rectangular segments 40 pixels wide and 30 pixels high. To see the size and shape of the created segments, activate the "Show Unmixed Segments" option, which outlines all the segments with dashed lines in the input image. If the outline color blends with the image colors, you can change the outline color for better visibility. By default, only the neighboring pixels will be mixed. To control the distance of randomness, you can set the maximum mixing step value. This option specifies the maximum distance each segment can move from its original position. You can further refine the randomness by specifying the percentage of segments in the image that should be shuffled. Pixel mixing can occur horizontally (segments shift within each row), vertically (segments shift within each column), or combined (segments shift across the entire image horizontally and vertically). Since most images cannot be perfectly divided into equal segments of the specified size, the image will often contain partial segments (with incomplete width or height) along the right edge or bottom edge. For images where dimensions don't perfectly align with the segment size, the third block of options lets you control how incomplete segments at the edges are treated. The "Exclude Partial Segments" option removes segments at the right edge that are smaller than the the specified segment dimensions. The "Shuffle Partials Separately" option mixes partial segments along the edges separately from full ones. The "Expand Partial Segments" option resizes partial segments to match the full segment dimensions with data within the partial segment. The "Fill with Average Color" option fills a partial segment with the average color of the available pixels. The "Fill with Custom Color" option fills a partial segment with a specified color. Finally, you can select the file format to save the image with mixed pixels. Available formats are PNG, JPEG, and WebP. Image-abulous!
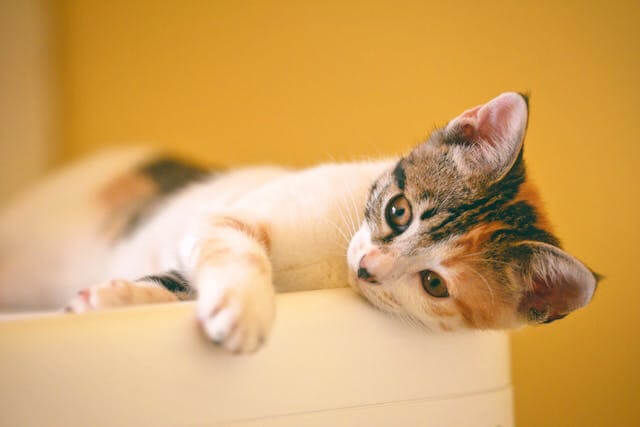
In this example, we apply a pixel-mixing effect to an image of a calico kitten. The image is divided into 60×60 pixel square blocks, and the blocks are randomly displaced across the entire image, both vertically and horizontally. To avoid partial blocks at the sides of the image, the incomplete blocks are filled with generated content from the original image to the size of 60×60 pixels so they blend seamlessly with the rest of the blocks. (Source: Pexels.)
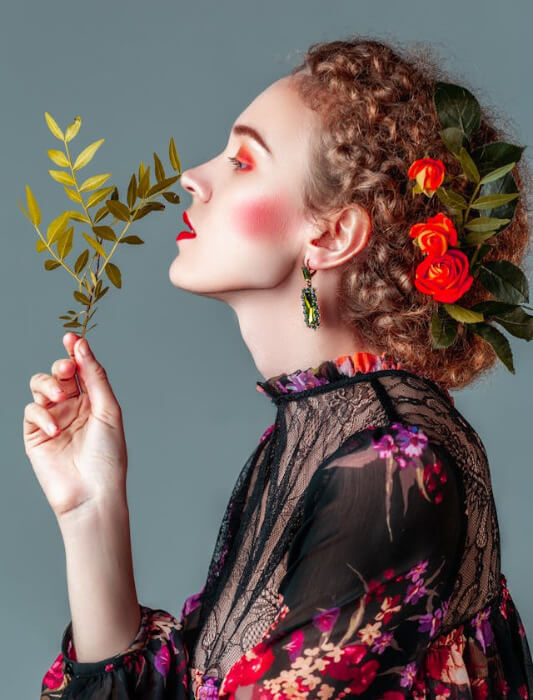
In this example, we add glitches to the portrait of a beautiful woman with flowers in her hair by applying a pixel displacement effect to it. The image is segmented into narrow vertical slices measuring 5×140 pixels, and 4% of these segments are randomized. The pixel stripes are allowed to move only vertically, either up or down, within their columns, while incomplete blocks are removed from the image, making the output portrait a little bit smaller than the original portrait. (Source: Pexels.)
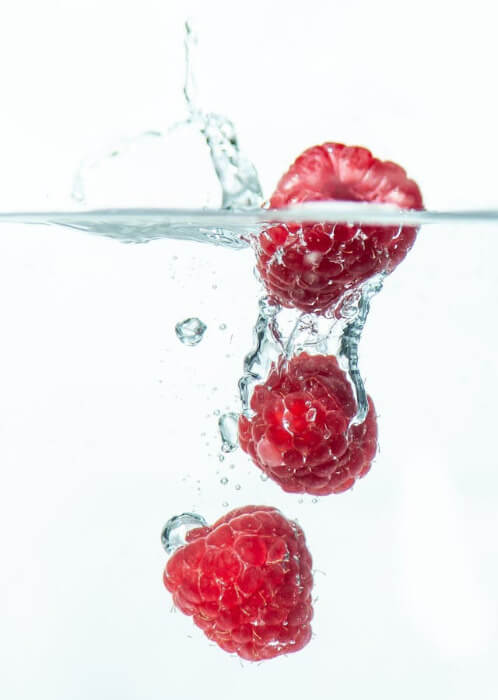
In this example, we use our tool to simulate a pixel diffusion effect, which is also known as a pixel-scattering effect. Pixel diffusion adds a dynamic effect to the image of raspberries falling into water. To create the effect, we activate the column scattering mode and divide the image into pixel groups of size 3×3 pixels. We set the diffusion depth to 6, which means the groups can't shift vertically by more than 6 positions. From all the groups, we select just half of them by setting the probability to 50%. The scattered pixels create a blurred trail of small image fragments along the vertical axis, simulating the motion of raspberries as they fall into the water. (Source: Pexels.)
Edit images in your browser.
Place images on a grid so that they make a Fibonacci spiral.
Convert a PNG image to an ICO icon.
Convert an ICO icon to a PNG image.
Convert a PNG image to a TIFF image.
Convert a TIFF image to a PNG image.
Convert a JPEG image to an ICO icon.
Convert an ICO icon to a JPEG image.
Convert a JPEG image to a TIFF image.
Convert a TIFF image to a JPEG image.
Convert a GIF image to an ICO icon.
Convert an ICO icon to a GIF image.
Convert a GIF image to a TIFF image.
Convert a TIFF image to a GIF image.
Convert a GIF image to an APNG icon.
Convert an APNG image to a PNG image.
Convert a bitmap image to an ICO icon.
Convert an ICO icon to a bitmap image.
Convert a bitmap image to a TIFF image.
Convert a TIFF image to a bitmap image.
Convert a Webp image to an ICO icon.
Convert an ICO icon to a Webp image.
Convert a Webp image to a TIFF image.
Convert a TIFF image to a Webp image.
Create an animated GIF image from static frames.
Create an image from an B, G, R array.
Create an image from an R, G, B, A array.
Create an image from an B, G, R, A array.
Increase the quality of an image.
Decrease the quality of an image.
Remove the pixelation effect from an image.
Remove the blur effect from an image.
Apply OCR on an image and extract all text from it.
Erase text or label from an image.
Erase any object from an image.
Convert an image to a thumbnail
Convert a PNG, GIF, JPG or BMP to glitch art.
Let Zalgo destroy an image.
Change an image color space to HSL, HSV, CMYK, or RGB.
Change an image bit depth to 32, 24, 16, 8, 4, 2 bits or just 1 bit.
Create a mosaic wall from multiple images.
Create an ASCII art image from a regular image.
Create an ANSI art image from a regular image.
Create a Unicode art image from a regular image.
Create a Braille art image from a regular image.
Add a short one-line label to an image.
Remove a watermark from an image.
Create an image made out of dots of varying size and spacing.
Convert an image to a bunch of blocks.
Create a GIF from the original image with interlacing effect.
Subscribe to our updates. We'll let you know when we release new tools, features, and organize online workshops.
Enter your email here
We're Browserling — a friendly and fun cross-browser testing company powered by alien technology. At Browserling we love to make people's lives easier, so we created this collection of image editing tools. Our tools have the simplest user interface that doesn't require advanced computer skills and they are used by millions of people every month. Our image tools are actually powered by our web developer tools that we created over the last couple of years. Check them out!


