Free online semitransparent image creator. Just drag and drop your image here and it will automatically get semitransparent regions. You can apply a uniform or gradient transparency effect, as well as adjust the percentage of opacity in the options. Created by engineers from team Browserling.
Free online semitransparent image creator. Just drag and drop your image here and it will automatically get semitransparent regions. You can apply a uniform or gradient transparency effect, as well as adjust the percentage of opacity in the options. Created by engineers from team Browserling.

This tool makes selected areas of an image transparent or semitransparent. The program can apply various degrees of opacity and even create gradient transparency effects. In the "Opacity" parameter, you can specify the desired level of semitransparency using a percentage. Here, 100% means complete opacity, while 0% means full transparency. For example, setting the value to 50% will make all pixels semitransparent to half their original opacity, allowing the background to be partially visible through them. The semitransparency effect can be applied to the entire image or any rectangular region within it. The position and size of this region can be controlled using the parameters "Position x", "Position y", "Region width", and "Region height". Additionally, you can interactively modify this region in the input preview field. The semitransparency effect can evenly cover the selected region or spread in a gradient manner. When selecting uniform transparency, the same percentage of opacity is applied uniformly across the entire selected area. On the other hand, when choosing gradient transparency, the program creates a gradient effect where the opacity percentage gradually changes across the region. The gradient can be either linear or radial. A linear gradient changes the opacity percentage along a vertical or horizontal line in one of the four selected directions. Meanwhile, a radial gradient emanates from a central or corner point in a circular form, following the specified radius of spread. Image-abulous!
This tool makes selected areas of an image transparent or semitransparent. The program can apply various degrees of opacity and even create gradient transparency effects. In the "Opacity" parameter, you can specify the desired level of semitransparency using a percentage. Here, 100% means complete opacity, while 0% means full transparency. For example, setting the value to 50% will make all pixels semitransparent to half their original opacity, allowing the background to be partially visible through them. The semitransparency effect can be applied to the entire image or any rectangular region within it. The position and size of this region can be controlled using the parameters "Position x", "Position y", "Region width", and "Region height". Additionally, you can interactively modify this region in the input preview field. The semitransparency effect can evenly cover the selected region or spread in a gradient manner. When selecting uniform transparency, the same percentage of opacity is applied uniformly across the entire selected area. On the other hand, when choosing gradient transparency, the program creates a gradient effect where the opacity percentage gradually changes across the region. The gradient can be either linear or radial. A linear gradient changes the opacity percentage along a vertical or horizontal line in one of the four selected directions. Meanwhile, a radial gradient emanates from a central or corner point in a circular form, following the specified radius of spread. Image-abulous!
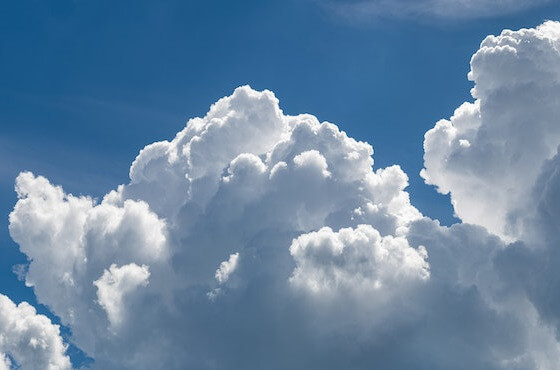
In this example, we apply a 30% semitransparent effect to all the white clouds in the blue sky of the image. We use uniform transparency, and to cover the entire image area, we simply clear the parameters for the rectangular region, allowing the program to automatically fill the entire space. (Source: Pexels.)
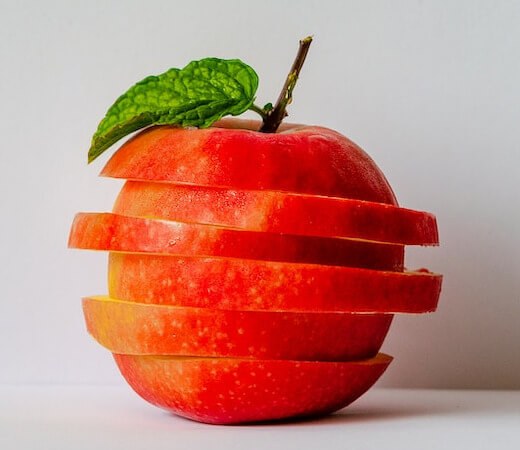
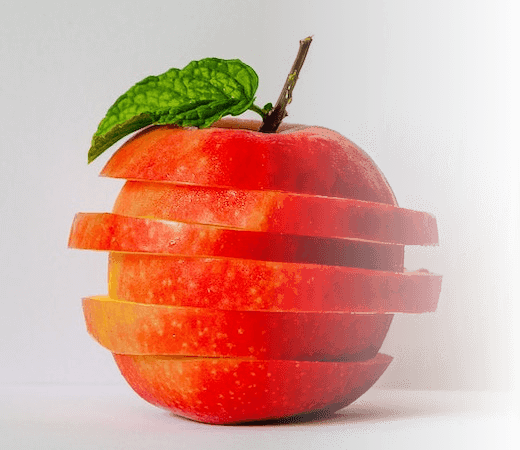
In this example, we switch to gradient transparency mode and create a linear semitransparent effect on half of the image. We select a rectangular region on the right side of the ripe apple and apply a linear transition of opacity from 100% (at the center) to 5% (on the right side). (Source: Pexels.)
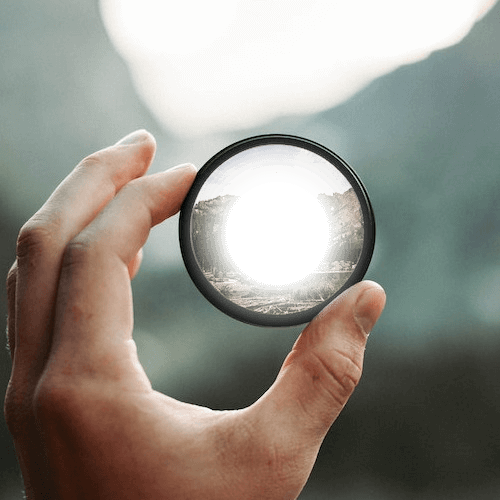
In this example, we create a radial gradient of transparency on a circular mirror image. We encompass the mirror with a square region in the input preview and set a radial gradient with a radius of 50, directed "Outside In". At the very center of the mirror, the transparency is set to 100%, while there is no transparency at the mirror's edge. (Source: Pexels.)
Edit images in your browser.
Place images on a grid so that they make a Fibonacci spiral.
Convert a PNG image to an ICO icon.
Convert an ICO icon to a PNG image.
Convert a PNG image to a TIFF image.
Convert a TIFF image to a PNG image.
Convert a JPEG image to an ICO icon.
Convert an ICO icon to a JPEG image.
Convert a JPEG image to a TIFF image.
Convert a TIFF image to a JPEG image.
Convert a GIF image to an ICO icon.
Convert an ICO icon to a GIF image.
Convert a GIF image to a TIFF image.
Convert a TIFF image to a GIF image.
Convert a GIF image to an APNG icon.
Convert an APNG image to a PNG image.
Convert a bitmap image to an ICO icon.
Convert an ICO icon to a bitmap image.
Convert a bitmap image to a TIFF image.
Convert a TIFF image to a bitmap image.
Convert a Webp image to an ICO icon.
Convert an ICO icon to a Webp image.
Convert a Webp image to a TIFF image.
Convert a TIFF image to a Webp image.
Create an animated GIF image from static frames.
Create an image from an B, G, R array.
Create an image from an R, G, B, A array.
Create an image from an B, G, R, A array.
Increase the quality of an image.
Decrease the quality of an image.
Remove the pixelation effect from an image.
Remove the blur effect from an image.
Apply OCR on an image and extract all text from it.
Erase text or label from an image.
Erase any object from an image.
Convert an image to a thumbnail
Convert a PNG, GIF, JPG or BMP to glitch art.
Let Zalgo destroy an image.
Change an image color space to HSL, HSV, CMYK, or RGB.
Change an image bit depth to 32, 24, 16, 8, 4, 2 bits or just 1 bit.
Create a mosaic wall from multiple images.
Create an ASCII art image from a regular image.
Create an ANSI art image from a regular image.
Create a Unicode art image from a regular image.
Create a Braille art image from a regular image.
Add a short one-line label to an image.
Remove a watermark from an image.
Create an image made out of dots of varying size and spacing.
Convert an image to a bunch of blocks.
Create a GIF from the original image with interlacing effect.
Subscribe to our updates. We'll let you know when we release new tools, features, and organize online workshops.
Enter your email here
We're Browserling — a friendly and fun cross-browser testing company powered by alien technology. At Browserling we love to make people's lives easier, so we created this collection of image editing tools. Our tools have the simplest user interface that doesn't require advanced computer skills and they are used by millions of people every month. Our image tools are actually powered by our web developer tools that we created over the last couple of years. Check them out!


