Free online image annotator. Just drag and drop your image here and it will automatically get your annotation. You can add any labels, markings, signs, tags, or symbols and customize their color, size, position, and style. Created by engineers from team Browserling.
Free online image annotator. Just drag and drop your image here and it will automatically get your annotation. You can add any labels, markings, signs, tags, or symbols and customize their color, size, position, and style. Created by engineers from team Browserling.

This tool adds various annotations (text, labels, arrows, boxes) to images. They are overlaid on top of the input images and can be easily customized using options for color, font, size, position, and alignment. Now, let's go into detail. The annotation you want to add to the image can be specified in the text field provided in the options. It can contain any textual letters and characters, including Unicode emojis. You can color it in any desired color and also add a background fill underneath it. Additionally, you can apply a shadow effect to the annotation text by specifying shadow properties such as offset, blur radius, and color. For example, "1px 2px 3px gray". You can determine the font size for the annotation text based on the size of the input image. You can also specify the line height of the annotation text, which determines the vertical spacing between lines. The font for the annotation can be chosen from a list of available options. The list includes popular fonts such as Arial, Times New Roman, Helvetica, and more. You can also import a custom font from a URL. The annotation text can be formatted in bold or italic style. The position of the annotation is controlled by placing a rectangular region on the image. This can be done either in the input preview by dragging the mouse or in the options using parameters such as the left position (X-coordinate of the annotation's left position), top position (Y-coordinate of the annotation's top position), width (width of the annotation label), and height (height of the annotation label). You can also align the annotation text within the rectangular region to the center, left, or right. For saving the annotated image, the available formats are PNG, JPEG, and WebP. Image-abulous!
This tool adds various annotations (text, labels, arrows, boxes) to images. They are overlaid on top of the input images and can be easily customized using options for color, font, size, position, and alignment. Now, let's go into detail. The annotation you want to add to the image can be specified in the text field provided in the options. It can contain any textual letters and characters, including Unicode emojis. You can color it in any desired color and also add a background fill underneath it. Additionally, you can apply a shadow effect to the annotation text by specifying shadow properties such as offset, blur radius, and color. For example, "1px 2px 3px gray". You can determine the font size for the annotation text based on the size of the input image. You can also specify the line height of the annotation text, which determines the vertical spacing between lines. The font for the annotation can be chosen from a list of available options. The list includes popular fonts such as Arial, Times New Roman, Helvetica, and more. You can also import a custom font from a URL. The annotation text can be formatted in bold or italic style. The position of the annotation is controlled by placing a rectangular region on the image. This can be done either in the input preview by dragging the mouse or in the options using parameters such as the left position (X-coordinate of the annotation's left position), top position (Y-coordinate of the annotation's top position), width (width of the annotation label), and height (height of the annotation label). You can also align the annotation text within the rectangular region to the center, left, or right. For saving the annotated image, the available formats are PNG, JPEG, and WebP. Image-abulous!
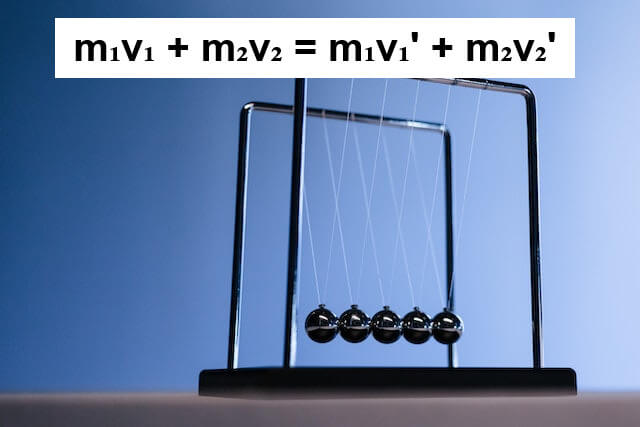
In this example, we use an image annotation program to comment on a physical experiment. We upload an image of a Newton's Cradle example and add the annotation "m₁v₁ + m₂v₂ = m₁v₁' + m₂v₂'". This formula describes the system and represents the law of conservation of momentum, which states that the sum of the momenta of the objects in a system remains constant if no external forces act upon them. To display the formula, we use bold Arial font in black color on a white rectangular background. (Source: Pexels.)
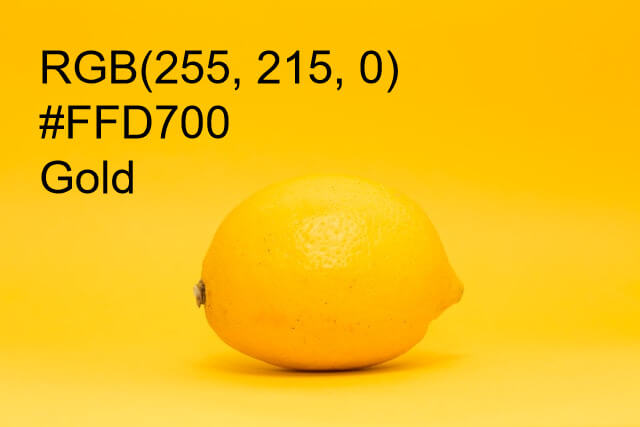
In this example, to study colors in design courses, it was necessary to visualize the "Gold" color. For this, we upload an image of a lemon on a golden background and add a label with the color name in hex, RGB, and HTML/CSS format. For good contrast, we choose black color for the text (without background) and use the popular sans-serif font Helvetica, aligning it to the left. (Source: Pexels.)
In this example, we annotate an image of a hiker in the mountains with a short and powerful quote to inspire viewers. We enter the quote by the ancient Chinese philosopher Lao Tzu in the options and position it at the top of the image. To give the annotation an appealing look, we choose the custom font Raleway and apply a shadow effect with a blur radius of 6 pixels. (Source: Pexels.)
Edit images in your browser.
Place images on a grid so that they make a Fibonacci spiral.
Convert a PNG image to an ICO icon.
Convert an ICO icon to a PNG image.
Convert a PNG image to a TIFF image.
Convert a TIFF image to a PNG image.
Convert a JPEG image to an ICO icon.
Convert an ICO icon to a JPEG image.
Convert a JPEG image to a TIFF image.
Convert a TIFF image to a JPEG image.
Convert a GIF image to an ICO icon.
Convert an ICO icon to a GIF image.
Convert a GIF image to a TIFF image.
Convert a TIFF image to a GIF image.
Convert a GIF image to an APNG icon.
Convert an APNG image to a PNG image.
Convert a bitmap image to an ICO icon.
Convert an ICO icon to a bitmap image.
Convert a bitmap image to a TIFF image.
Convert a TIFF image to a bitmap image.
Convert a Webp image to an ICO icon.
Convert an ICO icon to a Webp image.
Convert a Webp image to a TIFF image.
Convert a TIFF image to a Webp image.
Create an animated GIF image from static frames.
Create an image from an B, G, R array.
Create an image from an R, G, B, A array.
Create an image from an B, G, R, A array.
Increase the quality of an image.
Decrease the quality of an image.
Remove the pixelation effect from an image.
Remove the blur effect from an image.
Apply OCR on an image and extract all text from it.
Erase text or label from an image.
Erase any object from an image.
Convert an image to a thumbnail
Convert a PNG, GIF, JPG or BMP to glitch art.
Let Zalgo destroy an image.
Change an image color space to HSL, HSV, CMYK, or RGB.
Change an image bit depth to 32, 24, 16, 8, 4, 2 bits or just 1 bit.
Create a mosaic wall from multiple images.
Create an ASCII art image from a regular image.
Create an ANSI art image from a regular image.
Create a Unicode art image from a regular image.
Create a Braille art image from a regular image.
Add a short one-line label to an image.
Remove a watermark from an image.
Create an image made out of dots of varying size and spacing.
Convert an image to a bunch of blocks.
Create a GIF from the original image with interlacing effect.
Subscribe to our updates. We'll let you know when we release new tools, features, and organize online workshops.
Enter your email here
We're Browserling — a friendly and fun cross-browser testing company powered by alien technology. At Browserling we love to make people's lives easier, so we created this collection of image editing tools. Our tools have the simplest user interface that doesn't require advanced computer skills and they are used by millions of people every month. Our image tools are actually powered by our web developer tools that we created over the last couple of years. Check them out!


