This free online tool lets you create a transparent WebP image. Just load your WebP image in the input editor, and you'll instantly get a WebP image with transparency in the output editor. You can specify the color you need to make transparent in the options and аdjust how many similar color shades should be included in the transparent area. You can also refine the transparent object edges and create a smooth, seamless blend between transparent and non-transparent areas. Created by team Browserling.
This free online tool lets you create a transparent WebP image. Just load your WebP image in the input editor, and you'll instantly get a WebP image with transparency in the output editor. You can specify the color you need to make transparent in the options and аdjust how many similar color shades should be included in the transparent area. You can also refine the transparent object edges and create a smooth, seamless blend between transparent and non-transparent areas. Created by team Browserling.
With this online tool, you can convert parts of a non-transparent WebP image to a transparent WebP image. For example, you can create WebPs with transparent backgrounds, isolate various graphics elements, such as logos, icons, and signatures, and create transparent files for creative overlays and multi-layer compositions. Additionally, you can remove a particular color from a WebP. The tool uses a fast algorithm to find all opaque regions of the specified color in your WebP and then removes them, effectively transforming them into transparent regions. The color of the area you want to make transparent can be specified in the options, or you can simply click on it in the input editor. You can also adjust the color tone sensitivity for the specified color. This feature allows you to match more or fewer shades of the specified color. The option that makes only those colors transparent that touch the edges of the WebP is particularly useful. It's ideal for creating a transparent background for centered objects, ensuring that only the outermost regions are affected but the colors inside the object stay opaque. To ensure that the object without a background merges smoothly with other artwork and looks great on colorful backgrounds, use the edge smoothing option. It applies anti-aliasing to pixels within the specified radius around the object, eliminating harsh edges. Before downloading, you can preview a black-and-white mask of your WebP to easily identify which areas were made transparent and which stayed opaque. In this mode, the black color represents transparent areas, while the white color represents opaque areas. Webp-abulous!
With this online tool, you can convert parts of a non-transparent WebP image to a transparent WebP image. For example, you can create WebPs with transparent backgrounds, isolate various graphics elements, such as logos, icons, and signatures, and create transparent files for creative overlays and multi-layer compositions. Additionally, you can remove a particular color from a WebP. The tool uses a fast algorithm to find all opaque regions of the specified color in your WebP and then removes them, effectively transforming them into transparent regions. The color of the area you want to make transparent can be specified in the options, or you can simply click on it in the input editor. You can also adjust the color tone sensitivity for the specified color. This feature allows you to match more or fewer shades of the specified color. The option that makes only those colors transparent that touch the edges of the WebP is particularly useful. It's ideal for creating a transparent background for centered objects, ensuring that only the outermost regions are affected but the colors inside the object stay opaque. To ensure that the object without a background merges smoothly with other artwork and looks great on colorful backgrounds, use the edge smoothing option. It applies anti-aliasing to pixels within the specified radius around the object, eliminating harsh edges. Before downloading, you can preview a black-and-white mask of your WebP to easily identify which areas were made transparent and which stayed opaque. In this mode, the black color represents transparent areas, while the white color represents opaque areas. Webp-abulous!
In this example, we create a WebP portrait of a girl with a transparent background. We select the emerald color area around the girl and make it transparent. The specific shade of this background color is chosen by clicking on the WebP in the input editor, resulting in the color "rgba(79, 166, 173, 255)" automatically put in the options. We also include multiple background color shades by increasing the color sensitivity to 28%. Additionally, we apply the anti-aliasing effect to create smoothed portrait edges. (Source: Pexels.)


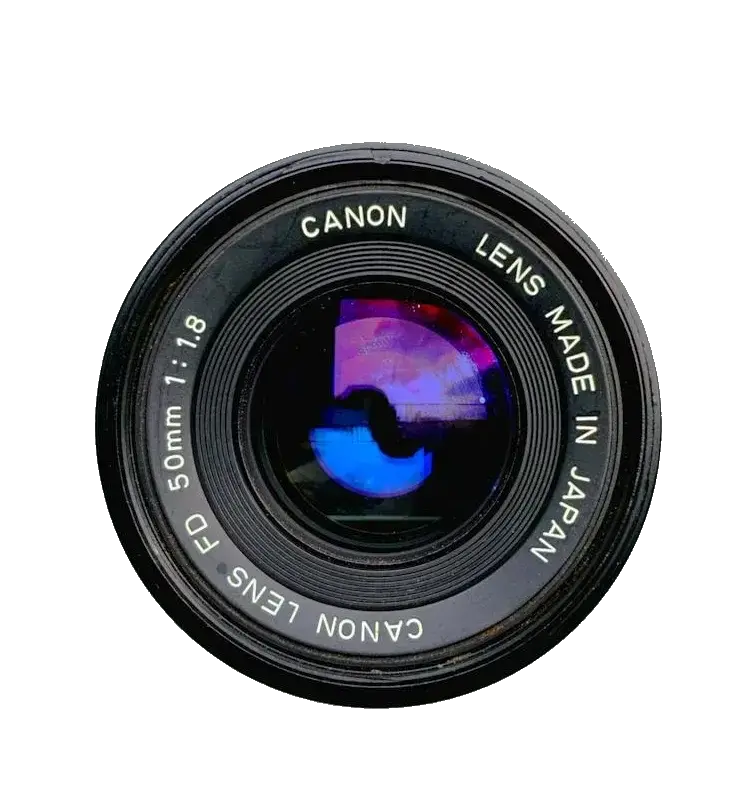
In this example, we enable the "Match External Areas" option to create a transparent area only around a camera lens. This option ensures that only the colors in contact with the outer perimeter of the WebP canvas become transparent. If this option was turned off, then the light-colored letters on the lens wouldn't remain opaque and would also become transparent, which is not what we want. (Source: Pexels.)

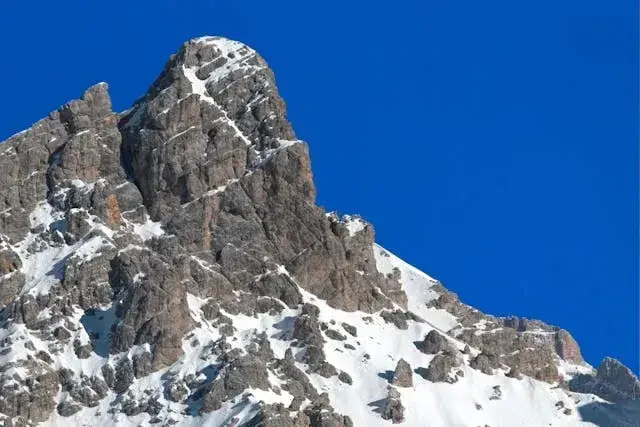
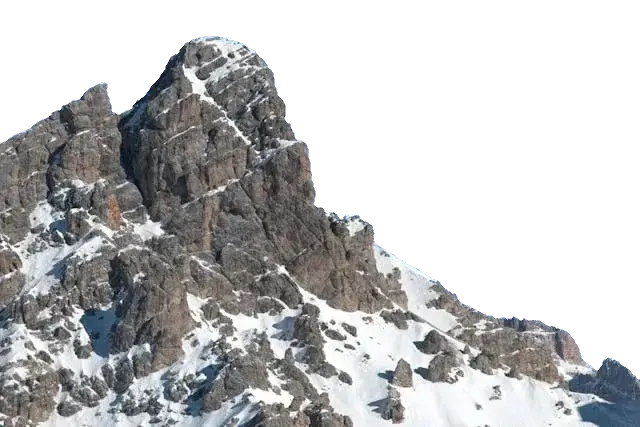
In this example, we remove the color from the upper part of a WebP photo and make the sky transparent. By simply clicking on the sky-blue color in the input editor, the tool selects all shades of sky above a snowy mountain and makes it fully transparent. For a more professional result, we increase the color similarity index to 18% and apply the edge smoothing effect with a radius of 1 pixel. (Source: Pexels.)
Edit WebP images in your browser.
Convert a WebP animation to an APNG animation.
Convert an APNG animation to a WebP animation.
Convert a WebP animation to a GIF animation.
Convert a GIF animation to a WebP animation.
Extract all frames from a WebP animation.
Convert a WebP animation to an MP4 video.
Convert an MP4 video to a WebP animation.
Convert a WebP animation to a WebM video.
Convert a WebM video to a WebP animation.
Find the difference between two or more WebP images.
Reduce the file size of a WebP image.
View the metadata information of a WebP image.
Remove all metadata information from a WebP image.
Edit the metadata information of a WebP image.
Play WebP animations frame by frame.
Extract one or more frames from a WebP animation.
Create a WebP animation from a sprite sheet.
Create a sprite sheet from a WebP animation.
View WebP images and in your browser.
Subscribe to our updates. We'll let you know when we release new tools and features, and when we organize online workshops.
Enter your email here
We're Browserling — a friendly and fun cross-browser testing company powered by alien technology. At Browserling we love to make people's lives easier, so we created this collection of WebP editing tools. Our tools have the simplest user interface that doesn't require advanced computer skills and they are used by millions of people every month. Our WebP tools are actually powered by our web developer tools that we created over the last couple of years. Check them out!