This free online tool lets you change the opacity of a WebP image. Just load your WebP image in the input editor, and you'll instantly get a semi-transparent WebP in the output editor. In the options, you can precisely adjust the opacity level, select the opacity region, and choose between uniform and gradient opacity types. Created by team Browserling.
This free online tool lets you change the opacity of a WebP image. Just load your WebP image in the input editor, and you'll instantly get a semi-transparent WebP in the output editor. In the options, you can precisely adjust the opacity level, select the opacity region, and choose between uniform and gradient opacity types. Created by team Browserling.

With this online tool, you can adjust the opacity level of WebP images. Opacity is a parameter that defines the visibility of pixels in a WebP. It's measured in percentage, where 0% means "no opacity", which makes all pixels fully transparent and invisible, and 100% means "full opacity", which makes all pixels opaque and removes all transparent or semi-transparent pixels. To use the tool, simply open a WebP in the input editor and select the area where you want to change the opacity. This can be done directly in the input editor by adjusting the edges of the area or through the options by specifying exact numerical values of the opacity area – its left and top positions and its size as width and height. The opacity level is also adjustable in the options via a percentage value from 0% to 100%. You can uniformly change the opacity level in the whole WebP, just the selected region, or create a gradient transition of opacity. In the case of the opacity gradient, you can choose between a linear gradient and a radial gradient. A linear gradient smoothly changes the opacity of pixels along a straight line, while a radial gradient changes the opacity from the center to the edges, similar to a ripple in water. For the linear gradient, you can choose the opacity change direction: left to right, right to left, top to bottom, and bottom to top. For the radial gradient, you can specify the opacity radius and direction: inside out (from center to the edges) or outside in (from edges to the center). Webp-abulous!
With this online tool, you can adjust the opacity level of WebP images. Opacity is a parameter that defines the visibility of pixels in a WebP. It's measured in percentage, where 0% means "no opacity", which makes all pixels fully transparent and invisible, and 100% means "full opacity", which makes all pixels opaque and removes all transparent or semi-transparent pixels. To use the tool, simply open a WebP in the input editor and select the area where you want to change the opacity. This can be done directly in the input editor by adjusting the edges of the area or through the options by specifying exact numerical values of the opacity area – its left and top positions and its size as width and height. The opacity level is also adjustable in the options via a percentage value from 0% to 100%. You can uniformly change the opacity level in the whole WebP, just the selected region, or create a gradient transition of opacity. In the case of the opacity gradient, you can choose between a linear gradient and a radial gradient. A linear gradient smoothly changes the opacity of pixels along a straight line, while a radial gradient changes the opacity from the center to the edges, similar to a ripple in water. For the linear gradient, you can choose the opacity change direction: left to right, right to left, top to bottom, and bottom to top. For the radial gradient, you can specify the opacity radius and direction: inside out (from center to the edges) or outside in (from edges to the center). Webp-abulous!
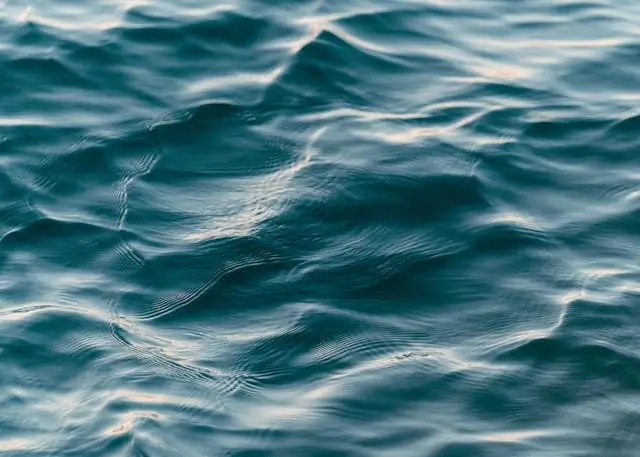
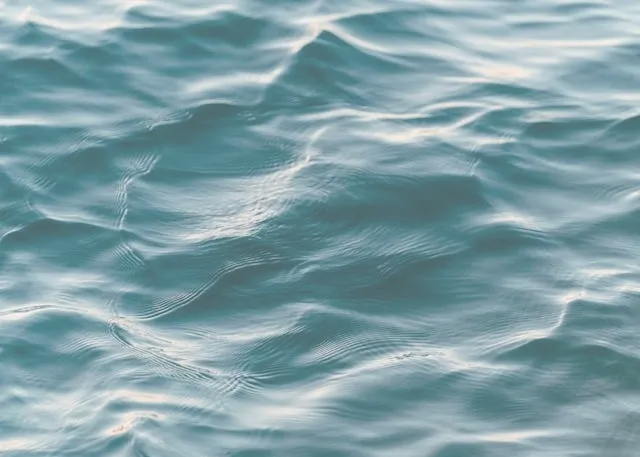
In this example, we slightly reduce the opacity of the entire WebP image of water waves. We set the opacity to 70% and select the "Uniform Opacity" mode. This results in a 30% translucent WebP image, allowing a little bit of content underneath it to be visible. To select the entire WebP, we leave the top, left, width, and height options empty. (Source: Pexels.)
In this example, we apply a fading linear gradient opacity effect to a WebP photo of a sunset over the ocean. We select a rectangular area below the horizon line and gradually decrease the pixel opacity from 100% to 20% as they move downward. This results in a fully opaque sky above the horizon and gradually fading ocean pixels, with the bottom row of pixels being just 20% opaque (which is the same as being 80% transparent). (Source: Pexels.)
This example uses the radial opacity method to make the bowl of macrons the central focus point of the WebP. The center of the opacity gradient is set to the center of the image, it's directed from the inside out, and its radius is set to 280 pixels. This configuration makes the edges of the WebP transparent while keeping the macarons in the center of the WebP fully visible. (Source: Pexels.)
Edit WebP images in your browser.
Convert a WebP animation to an APNG animation.
Convert an APNG animation to a WebP animation.
Convert a WebP animation to a GIF animation.
Convert a GIF animation to a WebP animation.
Extract all frames from a WebP animation.
Convert a WebP animation to an MP4 video.
Convert an MP4 video to a WebP animation.
Convert a WebP animation to a WebM video.
Convert a WebM video to a WebP animation.
Find the difference between two or more WebP images.
Reduce the file size of a WebP image.
View the metadata information of a WebP image.
Remove all metadata information from a WebP image.
Edit the metadata information of a WebP image.
Play WebP animations frame by frame.
Extract one or more frames from a WebP animation.
Create a WebP animation from a sprite sheet.
Create a sprite sheet from a WebP animation.
View WebP images and in your browser.
Subscribe to our updates. We'll let you know when we release new tools, features, and organize online workshops.
Enter your email here
We're Browserling — a friendly and fun cross-browser testing company powered by alien technology. At Browserling we love to make people's lives easier, so we created this collection of WebP editing tools. Our tools have the simplest user interface that doesn't require advanced computer skills and they are used by millions of people every month. Our WebP tools are actually powered by our web developer tools that we created over the last couple of years. Check them out!


