This free online tool lets you add a border to a WebP image. Just load your WebP image in the input editor, and you'll instantly get a WebP image with a border in the output editor. In the options, you can fine-tune the border's thickness and color, create a transparent border, and select the sides the border is added to. Additionally, you can choose the border type (inner, outer, or centered). Created by team Browserling.
This free online tool lets you add a border to a WebP image. Just load your WebP image in the input editor, and you'll instantly get a WebP image with a border in the output editor. In the options, you can fine-tune the border's thickness and color, create a transparent border, and select the sides the border is added to. Additionally, you can choose the border type (inner, outer, or centered). Created by team Browserling.

With this online tool, you can add a border around your WebP images. Adding a border can make your WebP image more noticeable and attractive, and you can choose from three border types – an opaque border (a single color border), a semi-transparent border, or a completely transparent border. An opaque border is most often used to separate the WebP from the background it's placed on; a semi-transparent border creates a subtle separation from its background, while a transparent border can increase the free space around the WebP. In the options, you can also choose where you want to place the border – outside the WebP (increasing its size), in the center of the WebP (with half of the border overlapping the image), or inside the WebP (with the border fully overlapping it). By default, the border is placed along all edges of the WebP. However, you can customize the placement of the border along the top, bottom, right, or left edge of the WebP. You can specify the border width in the options in pixels. For example, it can be 10, 40, or 100 pixels. You can also customize the color and transparency of the border in the options. For example, you can specify the border color by using color names, such as "white", "green", or "yellow", or by choosing a color from the palette. Additionally, you can use hex codes or RGB codes to specify the exact shade of the border. To change the transparency of the border, adjust the alpha channel slider in the palette. You can also use the special color name "transparent" to create an entirely transparent border or use hex and RGBA color codes with an alpha component. If you need to remove a border from a WebP, then you can use our Remove WebP Border tool. Webp-abulous!
With this online tool, you can add a border around your WebP images. Adding a border can make your WebP image more noticeable and attractive, and you can choose from three border types – an opaque border (a single color border), a semi-transparent border, or a completely transparent border. An opaque border is most often used to separate the WebP from the background it's placed on; a semi-transparent border creates a subtle separation from its background, while a transparent border can increase the free space around the WebP. In the options, you can also choose where you want to place the border – outside the WebP (increasing its size), in the center of the WebP (with half of the border overlapping the image), or inside the WebP (with the border fully overlapping it). By default, the border is placed along all edges of the WebP. However, you can customize the placement of the border along the top, bottom, right, or left edge of the WebP. You can specify the border width in the options in pixels. For example, it can be 10, 40, or 100 pixels. You can also customize the color and transparency of the border in the options. For example, you can specify the border color by using color names, such as "white", "green", or "yellow", or by choosing a color from the palette. Additionally, you can use hex codes or RGB codes to specify the exact shade of the border. To change the transparency of the border, adjust the alpha channel slider in the palette. You can also use the special color name "transparent" to create an entirely transparent border or use hex and RGBA color codes with an alpha component. If you need to remove a border from a WebP, then you can use our Remove WebP Border tool. Webp-abulous!
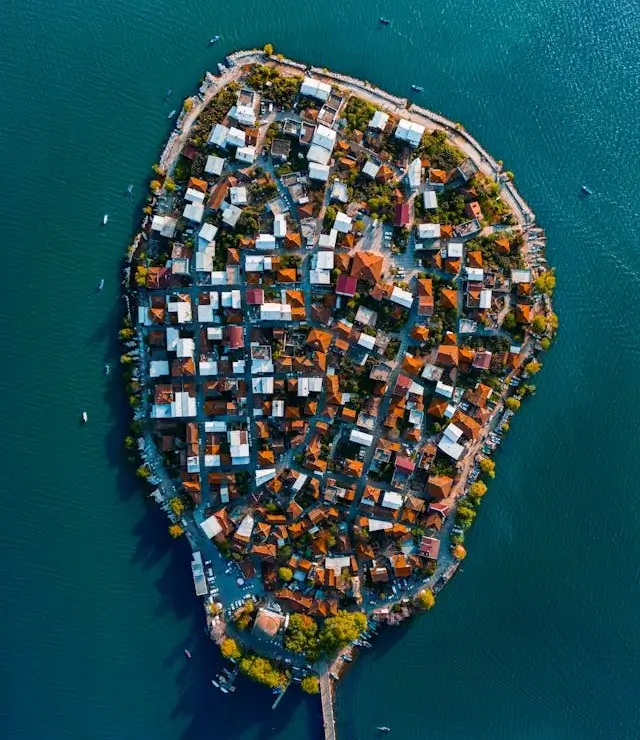
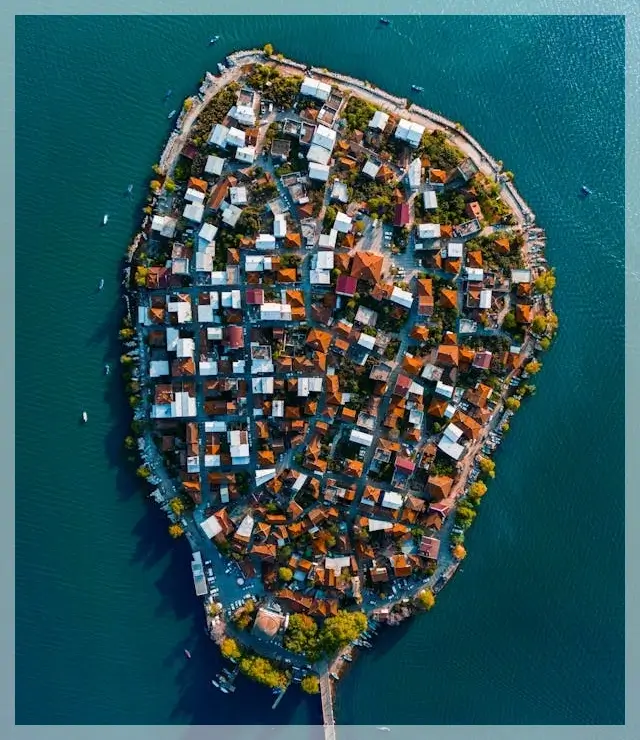
In this example, we add a thin, white, semi-transparent border around a WebP image of a peninsula. We'll be placing this WebP on our travel website, and this border will prevent it from blending into the website's background. The border is 15 pixels wide but as it's drawn inside the WebP, the width and height remain the same. (Source: Pexels.)
In this example, we add a bright, thick, gold-colored border to a WebP photo of the Tuscan Sun flower (also known as the Tuscan Gold flower). Adding such border draws significantly more attention to the WebP and highlights the beauty of the flower against the contrasting background. We apply the border only to the top and bottom parts of the WebP, creating two horizontal stripes, each 30 pixels wide, with 15 pixels inside the WebP and 15 pixels outside. (Source: Pexels.)


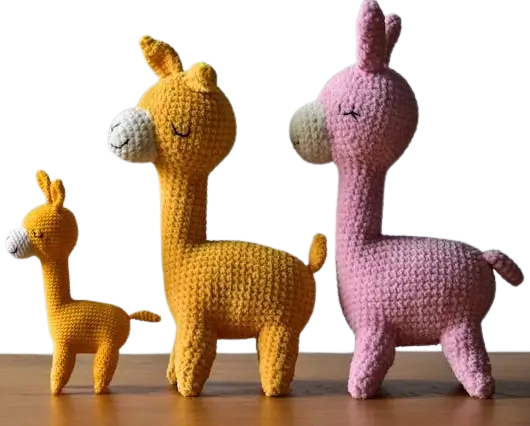
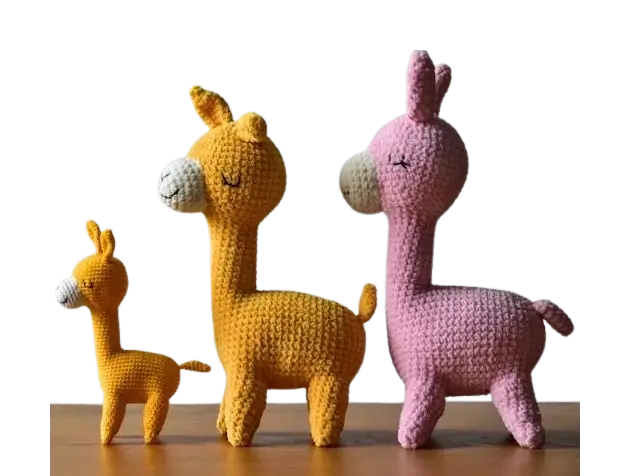
In this example, we use the transparent border to increase the size of a WebP picture of donkey toys and add a lot of free space around it. The border is added as padding, entirely outside of the WebP, and to demonstrate the possibilities of this tool, it's added only on the right, left, and top sides (the bottom side is skipped as it's not selected via a checkbox in the options). The padding width is 50 pixels, thus the width of the WebP increases by 100 pixels (50 pixels on each side) and the height increases by 50 pixels (50 pixels on the top side). As the transparent border can't be seen, it's visualized using a dashed line. (Source: Pexels.)
Edit WebP images in your browser.
Convert a WebP animation to an APNG animation.
Convert an APNG animation to a WebP animation.
Convert a WebP animation to a GIF animation.
Convert a GIF animation to a WebP animation.
Extract all frames from a WebP animation.
Convert a WebP animation to an MP4 video.
Convert an MP4 video to a WebP animation.
Convert a WebP animation to a WebM video.
Convert a WebM video to a WebP animation.
Find the difference between two or more WebP images.
Reduce the file size of a WebP image.
View the metadata information of a WebP image.
Remove all metadata information from a WebP image.
Edit the metadata information of a WebP image.
Play WebP animations frame by frame.
Extract one or more frames from a WebP animation.
Create a WebP animation from a sprite sheet.
Create a sprite sheet from a WebP animation.
View WebP images and in your browser.
Subscribe to our updates. We'll let you know when we release new tools and features, and when we organize online workshops.
Enter your email here
We're Browserling — a friendly and fun cross-browser testing company powered by alien technology. At Browserling we love to make people's lives easier, so we created this collection of WebP editing tools. Our tools have the simplest user interface that doesn't require advanced computer skills and they are used by millions of people every month. Our WebP tools are actually powered by our web developer tools that we created over the last couple of years. Check them out!