This free online tool lets you add the blur effect to a WebP image. Just load your WebP image in the input editor, and you'll instantly get a blurred WebP image in the output editor. You can customize the blur shape and location in the options or interactively in the input editor. Additionally, you can fine-tune the blur coordinates and adjust the blur intensity. Created by team Browserling.
This free online tool lets you add the blur effect to a WebP image. Just load your WebP image in the input editor, and you'll instantly get a blurred WebP image in the output editor. You can customize the blur shape and location in the options or interactively in the input editor. Additionally, you can fine-tune the blur coordinates and adjust the blur intensity. Created by team Browserling.
With this online tool, you can add a blur effect to your WebP images. Blurring allows you to focus attention on important elements of the WebP by hidding the background or other unnecessary details. Additionally, blurring is an effective method for protecting confidential information. For example, you can use it to obscure faces, addresses, car license plates, phone numbers, birth dates, or financial information. Once you load your WebP in the input editor, you can apply a rectangular, square, oval, or circle shaped blur effect, which can be customized in the options. Here you can specify the initial position via the "left position" and "top position" option fields and the size of blur effect via the "width" and "height" option fields. You can also adjust the blur shape interactively in the input editor by dragging the resizers. If you want to reverse the blur and keep the selected object in focus while blurring everything around it, use the "Invert Blur Area" option to invert the selection. This option will apply the blur effect to the entire WebP except for the selected rectangular or oval area. The blur effect intensity can be set using the "Blur Radius" option, which accepts a numerical value in pixels. The recommended blur range is 10 to 50 pixels. The larger this value, the stronger the blur. Webp-abulous!
With this online tool, you can add a blur effect to your WebP images. Blurring allows you to focus attention on important elements of the WebP by hidding the background or other unnecessary details. Additionally, blurring is an effective method for protecting confidential information. For example, you can use it to obscure faces, addresses, car license plates, phone numbers, birth dates, or financial information. Once you load your WebP in the input editor, you can apply a rectangular, square, oval, or circle shaped blur effect, which can be customized in the options. Here you can specify the initial position via the "left position" and "top position" option fields and the size of blur effect via the "width" and "height" option fields. You can also adjust the blur shape interactively in the input editor by dragging the resizers. If you want to reverse the blur and keep the selected object in focus while blurring everything around it, use the "Invert Blur Area" option to invert the selection. This option will apply the blur effect to the entire WebP except for the selected rectangular or oval area. The blur effect intensity can be set using the "Blur Radius" option, which accepts a numerical value in pixels. The recommended blur range is 10 to 50 pixels. The larger this value, the stronger the blur. Webp-abulous!
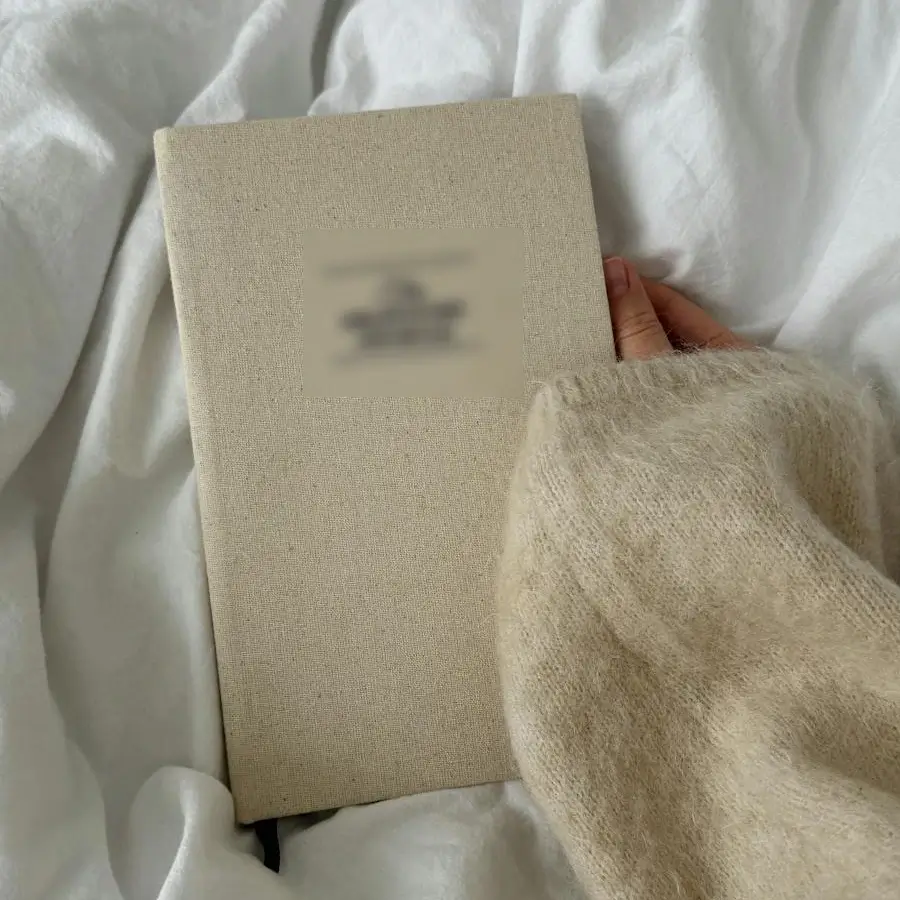
In this example, we apply a rectangular blur effect to a WebP image of a book. We set the blur intensity to 15 pixels and use it to hide the book's title. This is a quick and easy way to hide sensitive information in a WebP image while keeping the rest of the image visible. (Source: Pexels.)

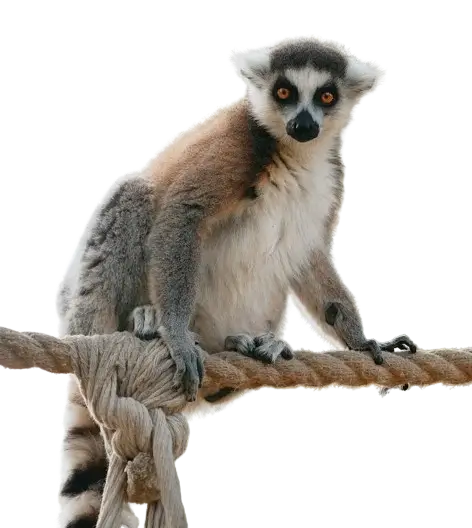
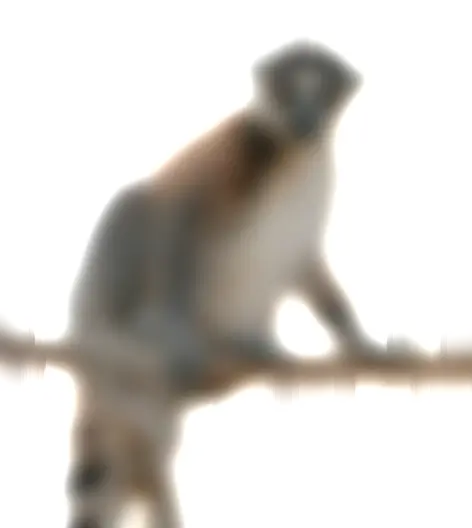
In this example, we add a blur effect to a transparent WebP sticker. The sticker was created from a WebP photo by removing its background with one of our other tools (Remove WebP Background). To make the sticker transparent, we extend the blur area to the full width and height of the WebP by leaving the blur size parameters empty in the options. We then increase the blur radius to 25 pixels, resulting in a completely blurred lemur hidden behind the effect. (Source: Pexels.)
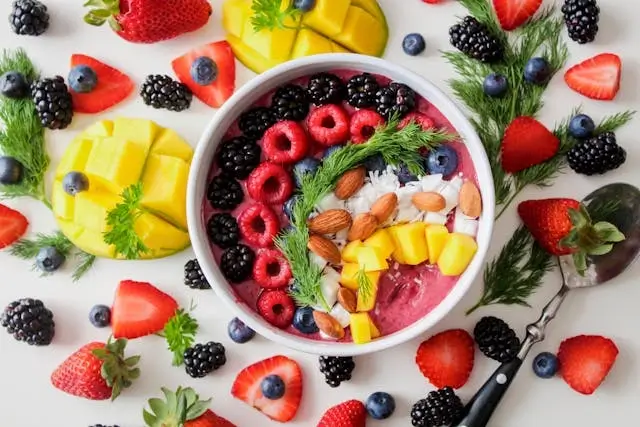
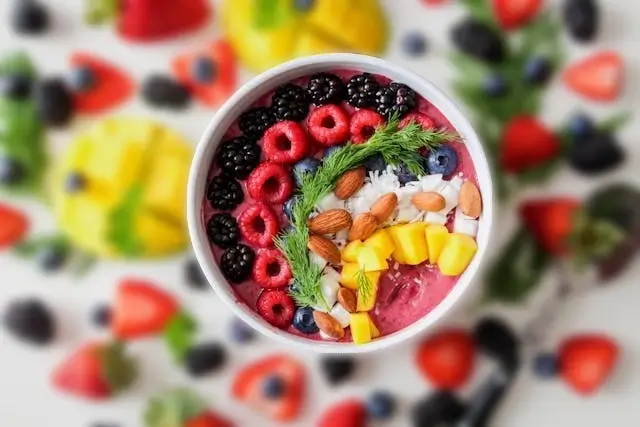
In this example, we use the inverted blur setting to bring the focus to the central object of a WebP picture. We select an oval shape for the blur and place it over the dessert bowl of fruit. Then we click the "Invert Blur Area" checkbox in the options, which turns everything around the bowl into a blurred background, highlighting the central bowl. (Source: Pexels.)
Edit WebP images in your browser.
Convert a WebP animation to an APNG animation.
Convert an APNG animation to a WebP animation.
Convert a WebP animation to a GIF animation.
Convert a GIF animation to a WebP animation.
Extract all frames from a WebP animation.
Convert a WebP animation to an MP4 video.
Convert an MP4 video to a WebP animation.
Convert a WebP animation to a WebM video.
Convert a WebM video to a WebP animation.
Find the difference between two or more WebP images.
Reduce the file size of a WebP image.
View the metadata information of a WebP image.
Remove all metadata information from a WebP image.
Edit the metadata information of a WebP image.
Play WebP animations frame by frame.
Extract one or more frames from a WebP animation.
Create a WebP animation from a sprite sheet.
Create a sprite sheet from a WebP animation.
View WebP images and in your browser.
Subscribe to our updates. We'll let you know when we release new tools and features, and when we organize online workshops.
Enter your email here
We're Browserling — a friendly and fun cross-browser testing company powered by alien technology. At Browserling we love to make people's lives easier, so we created this collection of WebP editing tools. Our tools have the simplest user interface that doesn't require advanced computer skills and they are used by millions of people every month. Our WebP tools are actually powered by our web developer tools that we created over the last couple of years. Check them out!